SpringBoot快速入门2
我们要掌握的目标:
- 能够完成application.properties配置文件的配置
- 能够完成application.yml配置文件的配置
- 能够使用SpringBoot集成Mybatis
- 能够使用SpringBoot集成Junit
- 能够使用SpringBoot集成Spring Data JPA
- 能够使用SpringBoot集成Redis
文章可能有点长,会有一点枯燥,不过基本上知识点都全了
SpringBoot的配置文件
SpringBoot配置文件类型和作用
SpringBoot是基于约定的,所以很多配置都有默认值,但如果想使用自己的配置替换默认配置的话,就可以使用application.properties或者application.yml(application.yaml)进行配置。
SpringBoot配置文件有两种,分别是properties属性文件和yml文件。其中properties属性文件我们很熟悉,所以接下来重点介绍的是yml文件的语法和使用方式。总体来说SpringBoot配置文件需要注意以下几点:
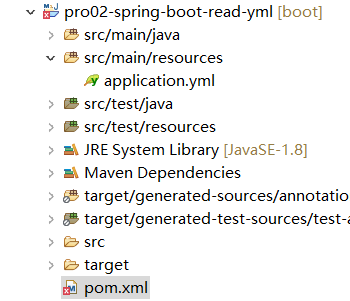
- 文件保存位置是main/resources目录
- 文件名是application.properties或application.yml(application.yaml)properties文件和yml文件二选一。我们所做的配置可以分开放在这两个配置文件中也可以只使用其中一个。
- 如果同一个配置项在两个配置文件中有不同配置——比如,server.port在properties文件里设置了1000,在yml文件里设置了2000——那么以properties文件为准,但说实话,这么干挺无聊的。
另外我们还要知道一点:SpringBoot本身已经有自动配置了,配置文件是对自动配置的调整和修改。
YAML简介
application.yml使用的是YAML语法,YAML的意思是:YAML is not markup language。
它强调自己不是XML、HTML这样的标记语言,不使用标签。
它以数据为中心,比JSON、XML更适合做配置文件。
YAML基本语法

注意:键和值大小写敏感。
值的类型
字面量、普通的字符串、数值、布尔类型。
注意:设置数据库密码的时候如果是0开头的一串数字会被SpringBoot按照8进制数据解析,从而导致连接数据库时密码错误。加上引号即可。
对象、Map
常规写法
1
2
3
| student:
stu-id: 5
stu-name: jerry
|
行内写法:
1
| student: { stu-id: 5,stu-name: jerry,subject: java }
|
数组
使用“-”表示数组中的元素,“-”后面同样需要一个空格。
常规写法
1
2
3
4
5
6
7
8
| student:
stu-id: 5
stu-name: jerry
graduated: false
subject:
- java
- php
- mysql
|
行内写法
1
2
3
4
5
| student:
stu-id: 5
stu-name: jerry
graduated: false
subject: [ java, php , mysql]
|
配置文件中的值注入JavaBean
Java类型
1
2
3
4
5
6
7
8
9
10
11
12
13
14
15
16
17
18
|
@Component
@ConfigurationProperties(prefix = "student")
public class Student {
private Integer stuId;
private String stuName;
private Boolean graduated;
private String[] subject;
@DateTimeFormat(pattern = "yyyy-MM-dd HH:mm:ss")
private Date birthday;
private Map<String, String> teachers;
private Address address;
|
说明
- 使用@Component注解是为了将当前类加入IOC容器
- @ConfigurationProperties表示将配置文件中的对应属性的值注入当前组件。
- prefix属性限定了配置文件中属性的范围。当我们指定了prefix=”student”时,只有student属性中的数据会被注入。
- 加入spring-boot-configuration-processor依赖后编写配置文件会根据@ConfigurationProperties注解标记的类生成提示。
1
2
3
4
5
| <dependency>
<groupId>org.springframework.boot</groupId>
<artifactId>spring-boot-configuration-processor</artifactId>
<optional>true</optional>
</dependency>
|
配置文件
1
2
3
4
5
6
7
8
9
10
11
12
13
14
15
16
17
| student:
stu-id: 5
stu-name: jerry
graduated: false
subject:
- java
- php
- mysql
birthday: 1998-10-12 20:15:06
teachers:
java: 千羽
mysql: 千寻
web: bob
address:
province: 广东
city: 深圳
street: XXX大道
|
测试
1
2
3
4
5
6
7
8
9
10
11
12
| @RunWith(SpringRunner.class)
@SpringBootTest
public class MySpringBootTest {
Logger logger = LoggerFactory.getLogger(MySpringBootTest.class);
@Autowired
private Student student;
@Test
public void testReadYaml() {
logger.info(student.toString());
}
|
使用@Value注解读取配置文件
@Value注解能够以更简单的方式读取配置文件中的值,但是仅限于简单类型。
yml配置文件:
1
| nateshao.best.wishes: "快点开学我就快乐!"
|
测试结果:

Spring的注解
@Configuration注解
使用@Configuration注解标记一个类后, 这个类成为配置类,加载这个类中的配置可以取代以前的XML配置文件。
1
2
3
4
5
| @Configuration
public class SpringAnnotationConfig {
}
|
基于注解类而不是XML配置文件创建IOC容器对象的代码如下:
1
| ApplicationContext iocContainer = new AnnotationConfigApplicationContext(SpringAnnotationConfig.class);
|
@Bean注解
相当于XML配置文件中的bean标签。用于把一个类的对象加入IOC容器。
1
2
3
4
5
6
7
8
9
| @Configuration
public class SpringAnnotationConfig {
@Bean
public EmployeeService getEmployeeService() {
return new EmployeeService();
}
}
|
@Import注解
相对于@Bean注解,使用@Import注解可以更便捷的将一个类加入IOC容器。
1
2
3
4
5
| @Configuration
@Import(EmployeeHandler.class)
public class SpringAnnotationConfig {
}
|
@Conditional注解
一个类在满足特定条件时才加入IOC容器。
@ComponentScan注解
指定IOC容器扫描的包。相当于在XML中配置context:component-scan
1
2
3
4
5
6
7
8
9
10
| @ComponentScan(
value="com.nateshao.spring.annotation.component",
useDefaultFilters = false,
includeFilters = {
@Filter(type = FilterType.ANNOTATION, classes = Controller.class)
},
excludeFilters = {
@Filter(type = FilterType.ANNOTATION, classes = Service.class)
}
)
|
SpringBoot的注解
@SpringBootConfiguration注解
@Configuration注解的SpringBoot版。
1
2
3
4
5
6
7
| @Target(ElementType.TYPE)
@Retention(RetentionPolicy.RUNTIME)
@Documented
@Configuration
public @interface SpringBootConfiguration {
}
|
@EnableAutoConfiguration注解
启用自动化配置功能。
1
2
3
4
5
6
7
8
9
10
11
12
13
14
15
16
17
18
19
20
21
22
23
24
25
| @Target(ElementType.TYPE)
@Retention(RetentionPolicy.RUNTIME)
@Documented
@Inherited
@AutoConfigurationPackage
@Import(AutoConfigurationImportSelector.class)
public @interface EnableAutoConfiguration {
String ENABLED_OVERRIDE_PROPERTY = "spring.boot.enableautoconfiguration";
/**
* Exclude specific auto-configuration classes such that they will never be applied.
* @return the classes to exclude
*/
Class<?>[] exclude() default {};
/**
* Exclude specific auto-configuration class names such that they will never be
* applied.
* @return the class names to exclude
* @since 1.3.0
*/
String[] excludeName() default {};
}
|
SpringBoot在这里通过@Import注解中的AutoConfigurationImportSelector.class将所有需要导入的组件以全类名的方式返回;这些组件就会被添加到容器中,给容器中导入非常多的自动配置类(XxxxAutoConfiguration)。这样就给容器中导入了这个场景需要的所有组件,并配置好这些组件。而这些组件以前是需要我们手动在XML中配置才能加入IOC容器。
@AutoConfigurationPackage注解
指定自动化配置的包。
1
2
3
4
5
6
7
8
9
| @Target(ElementType.TYPE)
@Retention(RetentionPolicy.RUNTIME)
@Documented
@Inherited
@Import(AutoConfigurationPackages.Registrar.class)
public @interface AutoConfigurationPackage {
}
|
SpringBoot在这里通过@Import注解中的AutoConfigurationPackages.Registrar.class将主启动类所在包和它的子包中的所有组件扫描到IOC容器。
@SpringBootApplication注解
表示当前应用是一个SpringBoot应用。包含@SpringBootConfiguration、@EnableAutoConfiguration、@ComponentScan注解。
SpringBoot工作原理
读取spring.factories文件
SpringBoot启动时会读取spring-boot-autoconfigure-2.1.6.RELEASE.jar包下的META-INF/spring.factories文件。读取org.springframework.boot.autoconfigure.EnableAutoConfiguration属性的值加载自动配置类。
加载XxxProperties类
根据自动配置类中指定的XxxProperties类设置自动配置的属性值,开发者也可以根据XxxProperties类中指定的属性在yml配置文件中修改自动配置。
根据@ConditionalXxx注解决定加载哪些组件
SpringBoot通过@ConditionalXxx注解指定特定组件加入IOC容器时所需要具备的特定条件。这个组件会在满足条件时加入IOC容器。
SpringBoot与整合其他技术
个人总结:SpringBoot整合什么就在pom.xml文件加入什么依赖
SpringBoot整合Mybatis
添加Mybatis的起步依赖
1
2
3
4
5
6
7
8
9
10
11
12
13
14
15
16
17
18
19
20
21
|
<dependency>
<groupId>org.mybatis.spring.boot</groupId>
<artifactId>mybatis-spring-boot-starter</artifactId>
<version>2.1.0</version>
</dependency>
<dependency>
<groupId>mysql</groupId>
<artifactId>mysql-connector-java</artifactId>
</dependency>
<dependency>
<groupId>com.alibaba</groupId>
<artifactId>druid</artifactId>
<version>1.0.5</version>
</dependency>
<dependency>
<groupId>org.springframework.boot</groupId>
<artifactId>spring-boot-starter-test</artifactId>
<scope>test</scope>
</dependency>
|
创建user表
在test数据库中创建table_emp表
1
2
3
4
5
6
7
8
9
10
11
12
13
14
15
|
CREATE TABLE `table_emp` (
`emp_id` int NOT NULL AUTO_INCREMENT ,
`emp_name` varchar(100) NULL ,
`emp_age` int NULL ,
PRIMARY KEY (`emp_id`)
)
INSERT INTO `table_emp` VALUES ('1', 'zhangsan', '19');
INSERT INTO `table_emp` VALUES ('2', 'lisi', '18');
|
创建实体Bean
1
2
3
4
5
6
7
8
| public class Emp {
private Integer empId;
private String empName;
private Integer empAge;
}
|
编写Mapper接口
1
2
3
4
5
| public interface EmpMapper {
List<Emp> selectAll();
}
|
注意:@Mapper标记该类是一个mybatis的mapper接口,可以被spring boot自动扫描到spring上下文中
配置Mapper映射文件
1
2
3
4
5
6
7
8
9
| <<!DOCTYPE mapper PUBLIC "-//mybatis.org//DTD Mapper 3.0//EN" "http://mybatis.org/dtd/mybatis-3-mapper.dtd">
<mapper namespace="com.atguigu.spring.boot.mapper.EmpMapper">
<select id="selectAll"
resultType="com.atguigu.spring.boot.entity.Emp">
select emp_id empId, emp_name empName, emp_age empAge
from
table_emp
</select>
</mapper>
|
在yml配置文件中添加mybatis的信息
1
2
3
4
5
6
7
8
9
10
11
12
13
| spring:
datasource:
name: mydb
type: com.alibaba.druid.pool.DruidDataSource
url: jdbc:mysql://127.0.0.1:3306/sb_db?serverTimezone=UTC
username: root
password: 123456
driver-class-name: com.mysql.cj.jdbc.Driver
mybatis:
mapper-locations: classpath*:/mybatis/mapper/*Mapper.xml
logging:
level:
com.atguigu.spring.boot.mapper: debug
|
在logging.level下指定包名然后设置日志级别就能够针对某个包下的功能打印日志。现在对Mapper接口所在包打印日志就能够看到MyBatis打印的SQL语句。
主启动类
1
2
3
4
5
6
7
8
9
| @MapperScan("com.nateshao.spring.boot.mapper")
@SpringBootApplication
public class Pro17SpringBootMybatisApplication {
public static void main(String[] args) {
SpringApplication.run(Pro17SpringBootMybatisApplication.class, args);
}
}
|
这里使用了@MapperScan(“com.nateshao.spring.boot.mapper”)注解扫描Mapper接口所在的包。配置了这个扫描我们才能对Mapper接口进行自动装配。
测试
1
2
3
4
5
6
7
8
9
10
11
12
13
14
15
16
| @RunWith(SpringRunner.class)
@SpringBootTest
public class Pro17SpringBootMybatisApplicationTests {
@Autowired
private EmpMapper empMapper;
@Test
public void testSelectAll() {
List<Emp> selectAll = empMapper.selectAll();
for (Emp emp : selectAll) {
System.out.println(emp);
}
}
}
|
SpringBoot整合Junit
添加Junit的起步依赖
1
2
3
4
5
6
|
<dependency>
<groupId>org.springframework.boot</groupId>
<artifactId>spring-boot-starter-test</artifactId>
<scope>test</scope>
</dependency>
|
编写测试类
1
2
3
4
5
6
7
8
9
10
11
12
13
14
15
16
17
18
19
20
21
22
23
24
25
26
27
| package com.itheima.test;
import com.itheima.MySpringBootApplication;
import com.itheima.domain.User;
import com.itheima.mapper.UserMapper;
import org.junit.Test;
import org.junit.runner.RunWith;
import org.springframework.beans.factory.annotation.Autowired;
import org.springframework.boot.test.context.SpringBootTest;
import org.springframework.test.context.junit4.SpringRunner;
import java.util.List;
@RunWith(SpringRunner.class)
@SpringBootTest(classes = MySpringBootApplication.class)
public class MapperTest {
@Autowired
private UserMapper userMapper;
@Test
public void test() {
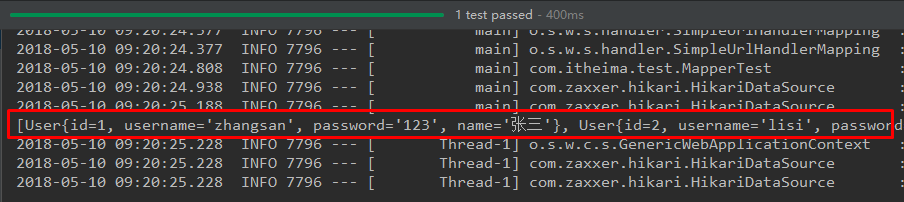
List<User> users = userMapper.queryUserList();
System.out.println(users);
}
}
|
其中,
SpringRunner继承自SpringJUnit4ClassRunner,使用哪一个Spring提供的测试测试引擎都可以
1
| public final class SpringRunner extends SpringJUnit4ClassRunner
|
@SpringBootTest的属性指定的是引导类的字节码对象
控制台打印信息
SpringBoot整合Spring Data JPA
添加Spring Data JPA的起步依赖
1
2
3
4
5
|
<dependency>
<groupId>org.springframework.boot</groupId>
<artifactId>spring-boot-starter-data-jpa</artifactId>
</dependency>
|
添加数据库驱动依赖
1
2
3
4
5
|
<dependency>
<groupId>mysql</groupId>
<artifactId>mysql-connector-java</artifactId>
</dependency>
|
在application.properties中配置数据库和jpa的相关属性
1
2
3
4
5
6
7
8
9
10
11
12
|
spring.datasource.driverClassName=com.mysql.jdbc.Driver
spring.datasource.url=jdbc:mysql://127.0.0.1:3306/test?useUnicode=true&characterEncoding=utf8
spring.datasource.username=root
spring.datasource.password=root
spring.jpa.database=MySQL
spring.jpa.show-sql=true
spring.jpa.generate-ddl=true
spring.jpa.hibernate.ddl-auto=update
spring.jpa.hibernate.naming_strategy=org.hibernate.cfg.ImprovedNamingStrategy
|
创建实体配置实体
1
2
3
4
5
6
7
8
9
10
11
12
13
14
15
| @Entity
public class User {
@Id
@GeneratedValue(strategy = GenerationType.IDENTITY)
private Long id;
private String username;
private String password;
private String name;
}
|
编写UserRepository
1
2
3
| public interface UserRepository extends JpaRepository<User,Long>{
public List<User> findAll();
}
|
编写测试类
1
2
3
4
5
6
7
8
9
10
11
12
13
14
| @RunWith(SpringRunner.class)
@SpringBootTest(classes=MySpringBootApplication.class)
public class JpaTest {
@Autowired
private UserRepository userRepository;
@Test
public void test(){
List<User> users = userRepository.findAll();
System.out.println(users);
}
}
|
控制台打印信息

注意:如果是jdk9,执行报错如下:

原因:jdk缺少相应的jar
解决方案:手动导入对应的maven坐标,如下:
1
2
3
4
5
6
|
<dependency>
<groupId>javax.xml.bind</groupId>
<artifactId>jaxb-api</artifactId>
<version>2.3.0</version>
</dependency>
|
SpringBoot整合Redis
添加redis的起步依赖
1
2
3
4
5
|
<dependency>
<groupId>org.springframework.boot</groupId>
<artifactId>spring-boot-starter-data-redis</artifactId>
</dependency>
|
配置redis的连接信息
1
2
3
|
spring.redis.host=127.0.0.1
spring.redis.port=6379
|
注入RedisTemplate测试redis操作
1
2
3
4
5
6
7
8
9
10
11
12
13
14
15
16
17
18
19
20
21
22
23
24
25
26
27
28
29
30
31
32
33
34
| @RunWith(SpringRunner.class)
@SpringBootTest(classes = SpringbootJpaApplication.class)
public class RedisTest {
@Autowired
private UserRepository userRepository;
@Autowired
private RedisTemplate<String, String> redisTemplate;
@Test
public void test() throws JsonProcessingException {
String userListData = redisTemplate.boundValueOps("user.findAll").get();
if(null==userListData){
List<User> all = userRepository.findAll();
ObjectMapper om = new ObjectMapper();
userListData = om.writeValueAsString(all);
redisTemplate.boundValueOps("user.findAll").set(userListData);
System.out.println("===============从数据库获得数据===============");
}else{
System.out.println("===============从redis缓存中获得数据===============");
}
System.out.println(userListData);
}
}
|
当然,还有很多Spring Boot整合其他东西,这里就不一一列举了,附上在码云上的一刀SpringBoot项目图谱,有时间在慢慢肝吧

总结,SpringBoot要做什么工作,集成什么环境,就添加什么依赖,然后继续肝就完事了
转载请注明来源,欢迎对文章中的引用来源进行考证,欢迎指出任何有错误或不够清晰的表达。可以在下面评论区评论,也可以邮件至 1210331079@qq.com

